0060: Cairo IV – Filled Arc, Precision Drawing, and Curves
This is a continuation of our Cairo briefs…
Filled Arc
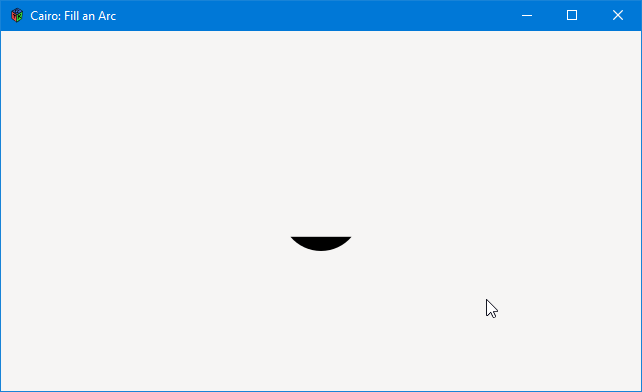
This is the callback:
bool onDraw(Scoped!Context context, Widget w)
{
	float x = 320, y = 180, radius = 40;
       float start = 0.7, finish = 2.44;

 	// draw the arc
	context.setLineWidth(3);
	context.arc(x, y, radius, start, finish);
	context.fill();

	return(true);

} // onDraw()
This is like the other arc() calls, but followed with a fill() command instead of stroke().
But we can also do some interesting stuff by issuing a bunch of arc() calls interspersed with moveTo()’s and such like…
A Cartoon Smile with Arcs
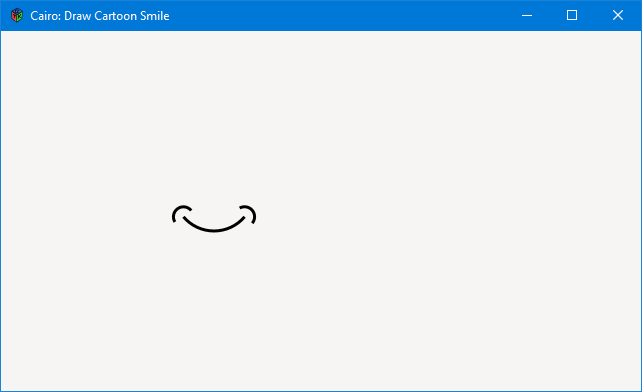
The cartoon smile is done like this:
bool onDraw(Scoped!Context context, Widget w)
{
	float xPos1 = 213, yPos1 = 160, xPos2, yPos2;
	float xPos3, yPos3, radius1 = 40, radius2 = 10;

	// draw the first arc (the mouth shape)
	context.setLineWidth(3);
	context.arc(xPos1, yPos1, radius1, 0.7, 2.44);
	context.stroke();
	// find the right corner of the mouth shape
	xPos2 = xPos1 + cos(0.7) * radius1;
	yPos2 = yPos1 + sin(0.7) * radius1;
	// draw the second arc
	context.arc(xPos2, yPos2, radius2, 4.2, 0.7);
	context.stroke();
	// find the left corner of the mouth shape
	xPos3 = xPos1 + cos(2.44) * radius1;
	yPos3 = yPos1 + sin(2.44) * radius1;
	// draw the third arc
	context.arc(xPos3, yPos3, radius2, 2.6, 5.6);
	context.stroke();

	return(true);

} // onDraw()
The X and Y Positions
These are the centers of our three circles around which we’ll draw three arcs. The first—xPos1, yPos1—is for the mouth shape and the other two are for the “smile lines.”
Finding the Corners of the Mouth
xPos2/yPos2 and xPos3/yPos3 are positioned at the two ends of the smile arc—the corners of the mouth—which takes a bit of trig, but nothing complicated.
Finding the end of an arc is pretty straightforward. Looking back at the start angle of the mouth arc and the radius, we calculate the right corner of the mouth like this:
xPos2 = xPos1 + cos(0.7) * radius1;
yPos2 = yPos1 + sin(0.7) * radius1;
I’ll throw in a quick reminder that arcs are drawn in a clockwise direction which is why this calculation yields xPos2/yPos2, the right corner.
Same for the left corner except we use the end position of the arc:
xPos3 = xPos1 + cos(2.44) * radius1;
yPos3 = yPos1 + sin(2.44) * radius1;
Follow each of those pairs of calculations with a call to arc() with a smaller radius and we’re done.
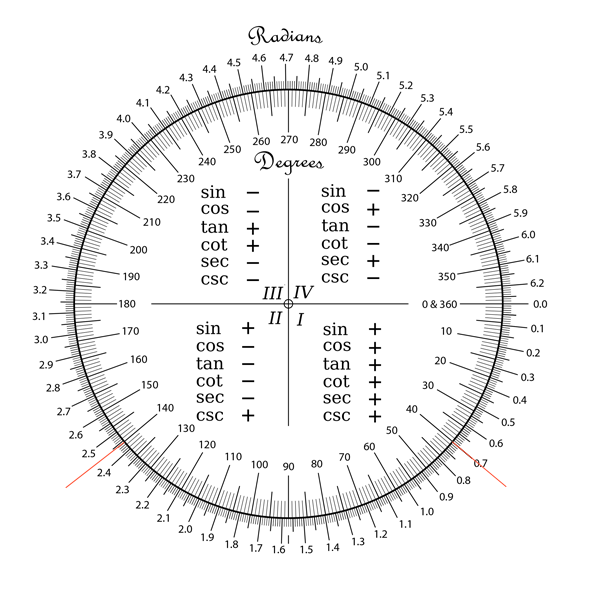
###Where Did Those cos() & sin() Args Come From?
They’re the start and end points of the ‘smile’ arc and they’re in radians. A quick look at our Radians Compass bears this out:
Drawing a Curve
In Cairo terms, the difference between an arc and curve is:
- an arc uses a center ‘anchor’ point as a base and two positions around a circle as start and end points, whereas
- a curve uses x/y locations to set up two control points and only needs coordinates for the end point of the curve.
So how does the curveTo() function know where to start the curve?
There are three rules governing placement of curveTo()’s starting x/y position:
- It’s set beforehand with
moveTo(), - if no
moveTo()call precedescurveTo(), the first control point doubles as a starting point, or - it uses the end point of a previously-drawn line, arc, or curve.
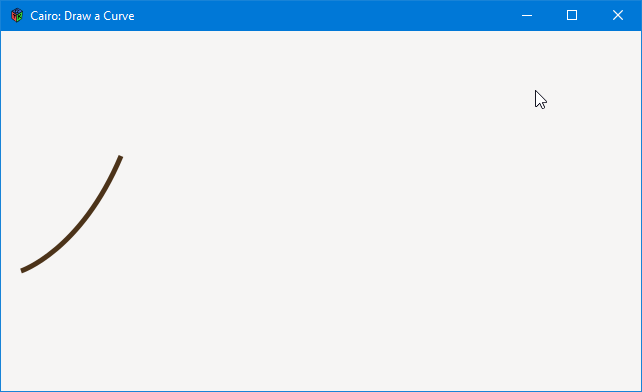
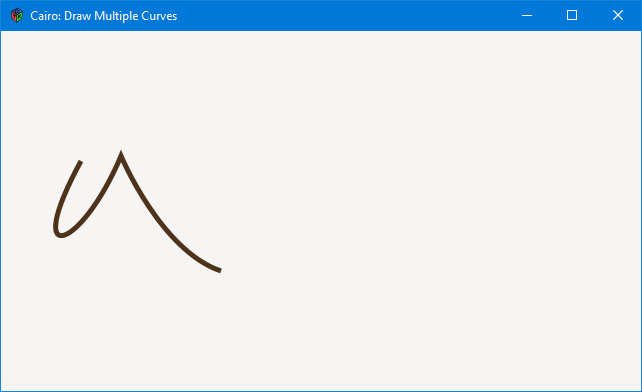
When you look at the code for our two example files, which are a single curve, and two curves joined together, you’ll note that the curve in the first example is repeated in the second, but the resulting curves are quite different. But, looking back at the rules, it’s easy to see why…
Comparing the two curve-drawing examples…
In the first example, the starting x/y position is passed to curveTo() and because it’s not preceded by a moveTo() call, it’s also where the drawing actually starts.
In the second example, however, the first call to curveTo() is preceded by a moveTo() which means the moveTo() decides where drawing starts. Here’s how the two examples play out:

Conclusion
Keep these things in mind while drawing curves and you’ll do just fine:
- remember to use a
moveTo()before acurveTo(), or else - the first x/y coordinate will be the starting point, and
- curves use control points to control the severity of the curve.
And that’s about it for curves. Next time, we’ll dig into what’s referred to as Cairo’s Toy Text mechanism. Until then.
Comments? Questions? Observations?
Did we miss a tidbit of information that would make this post even more informative? Let's talk about it in the comments.
- come on over to the D Language Forum and look for one of the gtkDcoding announcement posts,
- drop by the GtkD Forum,
- follow the link below to email me, or
- go to the gtkDcoding Facebook page.
You can also subscribe via RSS so you won't miss anything. Thank you very much for dropping by.
© Copyright 2025 Ron Tarrant
